NetData on a Synology NAS

I have been exploring NetData for a while as I was looking for a better solution to monitor my small homelab. For alerting I have Nagios running on a Raspberry Pi 2, which suffices to get alerts when something is wrong. As this does not really provide useful insights on what happened over time and lacked detailed insight for network equipment, I looked into various solutions over time but did not find what I was looking for. For a long time I tried Observium, but as that was primarily intended for the network side and did not fully meet my needs. It did do what it promised but the SNMP setup required everywhere, the slow SNMP polling mechanism and issues it caused made me decide to move on to something else.

Currently I am trying out Netdata and have a simple setup with a central NetData parent / collector running on a Pi5 (data is stored on an NVMe disk) with all other systems in my homelab streaming the data to and minimum local processing (Thin Mode as per the Netdata documentation). Setting up monitoring for network over SNMP is also pretty simple and although the UI is a lot simpler than Observium, it does what I need right now. NetData documentation is pretty good, so I will not cover my basic setup or the various options available in this post but focus on adding a Synology NAS..

Today I added my Synology DS1618+ to this setup so that I can get metrics and alerts via NetData for it as well (currently Nagios uses SNMP to monitor some aspects to it and that simply fails too often causing false alarms that I want to get rid of.

The initial install was based on the Install Netdata on Synology page. Then why still a blog post? The good news is that the basic installation now supports Synology DSM 7.2.2 and higher. However, the description was not accurate and left me with a NetData system that had warning alerts that still had to be resolved.. Therefore I share the steps I used install and resolve the issues (and update these when needed).

Initial installation

To install the stable version (now 2.5.1) of NetData, enable automatic update and disable the sharing of usage datas, ssh into the Synology NAS using an account that can run sudo and run the command:

wget -O /tmp/netdata-kickstart.sh https://get.netdata.cloud/kickstart.sh && sh /tmp/netdata-kickstart.sh --stable-channel --disable-telemetry

Now I do want NetData to run as non-root, but despite the statements on the installation page (at this moment) that this would require additional steps, this turned out not to be true. The installation script already created a netdata user and group and is also running as this. However, the delivered setup is not quite correct as created netdata user was not member of the netdata group. To correct this (or just to be sure) and make this change active run:

sudo synogroup --memberadd netdata netdata
sudo systemctl restart netdata

Netdata is now running on the NAS on port 19999 and it’s web UI can be accessed on that port. Please note that you may need to open your NAS’ firewall to be able to connect to it. Alternatively, you can also use SSH port forwarding (add -L 19999:localhost:19999 to your SSH command and NetData will be available as http://localhost:19999 as long as your SSH session is active).

Move Netdata to Storage [Addition 2025-05-18]

After running NetData for a while and despite being in Thin Client (i.e. streaming) mode, it will fill-up your root partition (the one where DSM lives), which is not good. To prevent this from becoming a problem, I moved NetData to a data volume post installation by running the following commands prior to the installation:

sudo systemctl stop netdata
sudo mv /opt/netdata /volume1/
sudo ln -s /volume1/netdata /opt/
sudo systemctl start netdata

Resolve restricted access to Synology’s Docker

After installation, NetData was unable to get the docker container names from the Docker engine running on my Synology NAS. This was caused by /var/run/docker.sock not being accessible. The easiest solution for this I found was to add user netdata to the group root, which owned the socket with:

sudo synogroup --memberadd root netdata

To make this change changes active run:

sudo systemctl restart netdata

Resolve system_clock_sync_state Alert

For unclear reasons, Synology DSM 7.2.2 does not seem to synchronize the system time with the real-time clock when NTP is enabled. Suggestions were provided in this forum post, which were in the right direction but outdated. To disable this error I found that editing /etc/chrony.conf.user and adding:

rtcsync

would do the trick after restarting chronyd with sudo systemctl restart chronyd the alert was cleared within seconds.

Setup Metric Streaming

As I had my existing setup and did not want the NAS to be busy with monitoring or stream it’s data to the (relatively slow) disks it has, I performed the following configuration changes:

  1. stop the running netdata with: sudo systemctl stop netdata
  2. change to the config directory: cd /opt/netdata/etc/netdata
  3. edit the main config file with sudo ./edit-config netdata.conf and change:
    1. to disable to web UI, add/change in section [web]:
      mode = none
    2. to disable the machine learning, add/change in section [ml]:
      enabled = no
    3. to disable health alerts, add/change in section [heath]:
      enabled = no
  4. create and edit the stream config file with sudo ./edit-config stream.conf and add/change in section [stream]:
    1. enabled = yes
    2. destination = <<YOUR NETDATA PARENT>>:19999
    3. api key = <<YOUR NETDATA STREAM API KEY>>
  5. change ownership and permissions of the created files with:
    1. sudo chgrp netdata netdata.conf stream.conf
    2. sudo chmod 640 netdata.conf stream.conf
  6. start netdata with: sudo systemctl start netdata

Netdata will soon start streaming metrics to you parent / collector server.

Conclusion

Having NetData running on my Synology NAS immediately gives me an insight in what is happening on the NAS out of the box. I still would be interested to see if more sensors area available via other plugins, but the basic metrics provided out of the box are already very useful.

The work is not yet done, as I currently still get 3 alerts for 10min_disk_backlog, this seems to happen more often and is something that can be tweaked according to this bug report. For now I have silenced them and will look into that at a later moment.

Happy New Year!

All the best for 2023 and that it may be a great and healthy year with more stability and peace than 2022!

The last almost two years I have not posted anything, simply because I did not have much time for it but also ais I did not really do anything noteworthy for a blog post. Currently I am working on several small projects again that probably will result in a post here about it.

Please note that I wil soon be moving my ancient Gitlab repository to something else (most likely Gitea as it seems to have all the features I need and is under active development). Links from this blog to my code may then change and I have not yet found a way to keep them working.

I will keep this short but expect to post some updates soon.

Ditching TeamViewer for AnyDesk

I have been using TeamViewer for many years to support my relatives abroad when they had issues with their PC. I really like the product, despite getting huge (100Mb on MacOS) and bloated with many new features I don’t need, as it did the job well and worked cross-platform. For this reason, I have also always endorsed it for professional use with employers / customers (with the right paid license of course). However, as TeamViewer seems to have changed their strategy and seems to now aggressively push free users into a subscription they forced me to consider other options and switch to AnyDesk.

Continue reading “Ditching TeamViewer for AnyDesk”

Installation of VMWare Tools (version 10.3.0) on vSphere Hypervisor

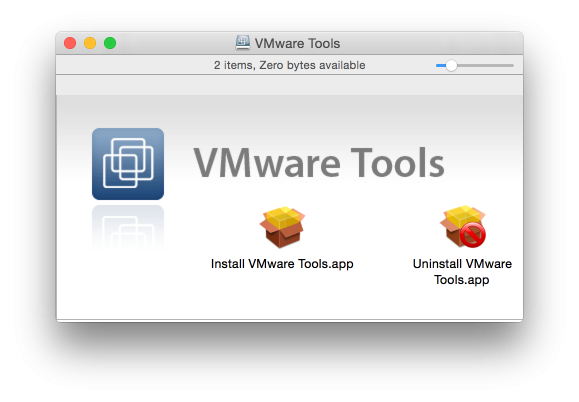
After my upgrade to vSphere Hypervisor 6.7 I (again) had to manually install the VMWare Tools for MacOS (and Solaris). VMware only includes the tools ISO images for Windows and Linux in the vSphere Hypervisor installer and during the installation process, any existing ISO image is removed.

As VMWare published version 10.3.0 of the VMWare Tools a few weeks ago, I will document in this (brief) post both the steps to upgrade VMWare tools on vSphere Hypervisor and the steps install the one for MacOS for future use.

Continue reading “Installation of VMWare Tools (version 10.3.0) on vSphere Hypervisor”

VMWare vSphere Hypervisor 6.7 supports MacOS 12.13 (and 12.14!)

I am running  VMWare’s free vSphere Hypervisor (formerly known as ESXi) on my Mid-2011 Mac Mini Server (Macmini5,3) for many years . Earlier this year VMWare introduced vSphere Hypervisor 6.7 but as it was not really clear what it would add and I had a stable environment I decided not to upgrade (yet) when it came out.

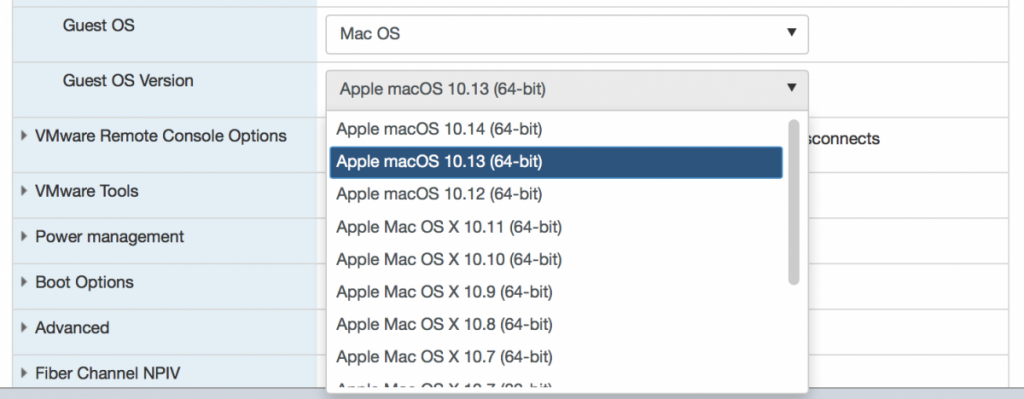
However, ever since Apple introduced the APFS filesystem with MacOS High Sierra, special care was required to install (or upgrade) a MacOS VM on vSphere Hypervisor as the built-in EFI boot did not support this. Since I had to create a new MacOS Server today, I decided to give this update a try to see if it would support MacOS High Sierra. Documentation was not very clear on this, but it turned out that with this version of vSphere Hypervisor, MacOS 12.13 (as well as 12.14!) is supported, as this is how the dropdown when creating a new VM now looks like for MacOS:

This post contains the steps to perform an upgrade from vSphere Hypervisor 6.5u1 to 6.7 on my Mid-2011 Mac Mini Server, including the installation of the (not included) VMWare Tools image for MacOS.

Continue reading “VMWare vSphere Hypervisor 6.7 supports MacOS 12.13 (and 12.14!)”

VMWare ESXi 6.5 Spectre patch available

Today I noticed that VMWare has released a partial solution for the Spectre security issue ( CVE-2017-5715), according to VMWare:

This ESXi patch provides part of the hypervisor-assisted guest mitigation of CVE-2017-5715 for guest operating systems. For important details on this mitigation, see VMware Security Advisory VMSA-2018-0004.3.

It can be downloaded from their site and is also available for the free ESXi 6.5 version, the file to download is ESXi650-201803001.zip, see also VMWare Knowledge Base article 52456. Installation is quite straightforward. Continue reading “VMWare ESXi 6.5 Spectre patch available”

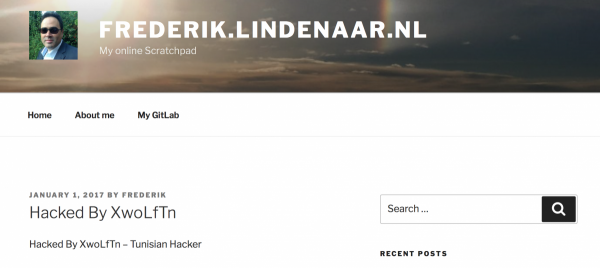
“Hacked” due to security issue in WordPress 4.7.1

Today morning I noticed that my blog had been altered as it looked as displayed in the picture above. The first thing I did when I noticed this was to take my webserver offline until I could check what actually happened and to assess the impact of this breach of security. Fortunately the damage turned out to be very limited and easy to resolve so after a short research I was able to reconnect my webserver again and write about it. Continue reading ““Hacked” due to security issue in WordPress 4.7.1″

Happy New Year!

Happy New Year and best wishes for 2017!

It’s a new year so the design of this blog has been refreshed as well. As I wrote a few weeks ago, some important things changed in my private live. On the short time it causes some stress and will be distracting me, but I have no doubts that this will be only for a short time. For now it means that I will probably have some more time for this blog and will be posting more frequent again, how this will develop on the longer term is still unsure.

For now I still have some time off to spend on my family and IT… keep posted for some updates the coming days. Anyway again all the best for this new fresh year!

Mac OS X SSH Client asking for password after upgrade to Sierra 10.12.2

After installing of OS X (MacOS) Sierra update 10.12.2 I noticed that SSH connections started to ask for the password of my RSA key. This wasn’t how it worked before and not what I want (as I trust my MacBook Pro) as it is quite annoying.

For the current session the solution was quite simple, just run the command: ssh-add -A

There seem to be many discussions online in what is causing this (i.e. here) with strange theories and odd (or not working) solutions. As documented also here, the root cause seems to be that the upstream OpenSSH code has changed and that Apple’s developers are following the changes.

The solution is fortunately quite simple: just create a file called ~/Library/LaunchAgents/org.openssh.plist with the following content:

<?xml version="1.0" encoding="UTF-8"?>
<!DOCTYPE plist PUBLIC "-//Apple//DTD PLIST 1.0//EN" "http://www.apple.com/DTDs/PropertyList-1.0.dtd">
<plist version="1.0">
    <dict>
    <key>Label</key>
    <string>Add SSH Keys to SSH Agent</string>
    <key>ProgramArguments</key>
    <array>
      <string>/usr/bin/ssh-add</string>
      <string>-A</string>
    </array>
    <key>RunAtLoad</key>
    <true/>
  </dict>
</plist>

And from the next login onwards your SSH key will be added to ssh-agent again.