In fall 2018, Apple will stop bundling open source services such as Calendar Server, Contacts Server, the Mail Server, DNS, DHCP, VPN Server, and Websites with macOS Server. Customers can get these same services directly from open-source providers. This way, macOS Server customers can install the most secure and up-to-date services as soon as they’re available.
For quite some time I am an happy user of Open Whisper Systems’ Signal Messenger phone application as alternative to WhatsApp. The fact that this solution is open source and that the exchange of messages (and now also calls) is secure and that this can be verified by anyone are important and valuable. I use it on my phone but as I spend most of my time behind a laptop and still (call me old-fashioned) prefer a real keyboard over a touch screen I have been looking for a way to use it from my laptop as well. Continue reading “Signal Desktop stand-alone OS X Application”
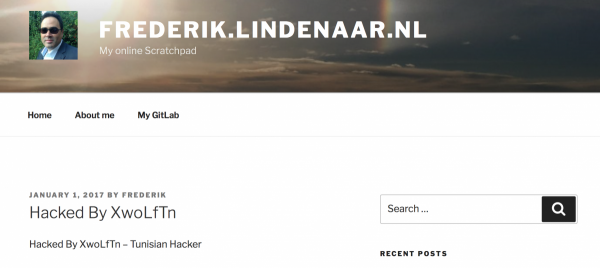
Today morning I noticed that my blog had been altered as it looked as displayed in the picture above. The first thing I did when I noticed this was to take my webserver offline until I could check what actually happened and to assess the impact of this breach of security. Fortunately the damage turned out to be very limited and easy to resolve so after a short research I was able to reconnect my webserver again and write about it. Continue reading ““Hacked” due to security issue in WordPress 4.7.1″
It’s a new year so the design of this blog has been refreshed as well. As I wrote a few weeks ago, some important things changed in my private live. On the short time it causes some stress and will be distracting me, but I have no doubts that this will be only for a short time. For now it means that I will probably have some more time for this blog and will be posting more frequent again, how this will develop on the longer term is still unsure.
For now I still have some time off to spend on my family and IT… keep posted for some updates the coming days. Anyway again all the best for this new fresh year!
After installing of OS X (MacOS) Sierra update 10.12.2 I noticed that SSH connections started to ask for the password of my RSA key. This wasn’t how it worked before and not what I want (as I trust my MacBook Pro) as it is quite annoying.
For the current session the solution was quite simple, just run the command: ssh-add -A
There seem to be many discussions online in what is causing this (i.e. here) with strange theories and odd (or not working) solutions. As documented also here, the root cause seems to be that the upstream OpenSSH code has changed and that Apple’s developers are following the changes.
The solution is fortunately quite simple: just create a file called ~/Library/LaunchAgents/org.openssh.plist with the following content:
For some time I have been looking for a way to do simplistic performance monitoring without the need of two linux (virtual) machines to use the obvious solution iPerf. The iPerf solution is fine for normal situations but not very practical to quickly test a connection between routers as it requires 2 additional machines and configuring them correctly for the networks they should be in.
It turned out that Cisco’s IOS has a ‘hidden’ command ttcp for exactly this purpose. This command ‘hidden’ as it is not visible in the command help and will not and not present in all IOS versions. Cisco states that it is a hidden, unsupported, privileged mode command that requires IOS 11.2 or higher and Feature Sets IP Plus (is- images) or Service Provider (p- images. However, Cisco stresses that the command’s availability may vary from one Cisco IOS software release to another (i.e. it may not exist in some releases). Documentation of it is available on Cisco’s Test TCP (TTCP) manual page (from 2005 so quite old).
Obviously the command works great between two Cisco’s (I could quite quickly measure the performance of my test DSL connection and it measured an expected 1.8Mbit throughput over the 2Mbit DSL connection. But how about a Cisco router and another system? After a little searching I found the nuttcp command, which according to its homepage is available for *nix systems but unfortunately the binary version of it does not install on Mac OS X. Fortunately the Debian Linux distribution has a package available so it was easy to get it installed on a Linux box (will look into an OS X version later when I really need it). In ‘legacy’ mode this command is working fine with Cisco’s implementation and running it is as easy as starting ttcp on the router and answering the prompts:
Router#ttcp
transmit or receive [receive]:
perform tcp half close [n]:
receive buflen [8192]:
bufalign [16384]:
bufoffset [0]:
port [5001]:
sinkmode [y]:
rcvwndsize [4128]:
delayed ACK [y]:
show tcp information at end [n]:

ttcp-r: buflen=8192, align=16384/0, port=5001
The last line is confirming that the router is waiting for a connection) and on the other end starting:
nuttcp <hostname or ip address of router>
This runs the throughput test from the Linux client using the Cisco as a receiver.
For some time I have a small test network with a number of old Cisco routers (mainly 2500 series). Recently I decided to purchase a c1841 through Marktplaats as the IOS versions of the 2500 is really ancient and is very limited for more complex setups nowadays (latest IOS version is 12.3)
With the c1841 I also obtained two SHDSL cards, specifically:
a G.SHDSL WIC (WIC-1SHDSL-V3)
a 2-pair G.SHDSL HWIC (HWIC-2SHDSL)
These cards are described in detail on Cisco’s website. It turned out that the G.SHDSL HWIC card is supported in my main router (a c1921), so I decided to connect my test network to my main router using a DSL connection using these two cards to fully separate the test network from my main networks (and for the fun of it). Cisco had a good guide available to set this up (see Configuring Cisco G.SHDSL HWICs in Cisco Access Routers and Setup back to back CPE connection and ) but as it turned out not to be totally trivial I decided to document my setup here as well.
Cabling
The nice thing about (SH)DSL is that it uses standard phone (CAT-4) cables that can be up to several kilometers long. For my test lab I started off with a standard (2-wire) phone cable with 6-pin RJ-11 connectors. (SH)DSL uses a straight connection where one of the ends should be put in CPE (subscriber) mode and the other one in CPO (office) mode.
As the 2-pair G.SHDSL HWIC (HWIC-2SHDSL) interface has two ports and I temporarily had two c1841 routers with a G.SHDSL WIC (WIC-1SHDSL-V3) I also created a splitter cable as per the Cisco G.SHDSL documentation (diagram below) to establish two DSL connections.
SHDSL RJ-11 splitter schematic
Dual DSL connection with 2 wires using a splitter cable
With the above cable it was quite easy to establish DSL connections between my c1921 router with the 2-pair G.SHDSL HWIC (HWIC-2SHDSL) card and two c1841with an G.SHDSL WIC (WIC-1SHDSL-V3) adapter. Unfortunately the 2-pair G.SHDSL HWIC (HWIC-2SHDSL) can only operate in CPE (client) mode so c1921 was running in CPE mode for both lines and the two c1841s both need to be set to CPO (office) mode. This setup looks like this:
Below is the configuration used:
c1921 with 2 DSL connections to 2 c1841s:
controller SHDSL 0/0/0
  dsl-group 0 pairs 0
  !
  dsl-group 1 pairs 1
  !
!
interface ATM0/0/0
  no ip address
  no atm ilmi-keepalive
  pvc 0/35
    encapsulation aal5snap
  !
  pvc 8/35
    encapsulation aal5mux ppp dialer
    dialer pool-member 2
  !
!
interface ATM0/0/1
  no ip address
  no atm ilmi-keepalive
  pvc 0/35
    encapsulation aal5snap
  !
  pvc 8/35
    encapsulation aal5mux ppp dialer
    dialer pool-member 3
  !
!
interface Dialer1
  ip unnumbered GigabitEthernet0/0
  encapsulation ppp
  dialer pool 2
  dialer-group 2
!
interface Dialer2
  ip unnumbered GigabitEthernet0/0
  encapsulation ppp
  dialer pool 3
  dialer-group 3
!
dialer-list 2 protocol ip permit
dialer-list 3 protocol ip permit
Obviously in a real-live setting additional statements will be required to ensure that firewall, nat, etc. are also correct but that is not the intention of this description. The above sets up the SHDSL adapter in 2-line more and defines two ppp connections over ATM and uses the IP address of the main GigabitEthernet interface also for the dialer interfaces. The corresponding configuration on the two c1841s is:
c1841 with DSL connections to c1921 (two times):
controller DSL 0/0/0
 mode atm
 line-term co
 dsl-mode shdsl symmetric annex B
!
interface ATM0/0/0
 no ip address
 no atm ilmi-keepalive
 pvc 0/35
  encapsulation aal5snap
 !
 pvc 8/35
  encapsulation aal5mux ppp dialer
  dialer pool-member 1
 !
!
interface Dialer0
 ip unnumbered Loopback0
 encapsulation ppp
 dialer pool 1
 dialer-group 1
!
ip route 0.0.0.0 0.0.0.0 Dialer 0
!
dialer-list 1 protocol ip permit
!
This (re)uses the IP address of the Loopback0 interface for the dialer interface. Thanks to the default route all 3 Cisco’s will be able to reach each other. During the simple speed tests I was able to do I noticed that the DSL connection could almost reach it’s 2Mbit maximum throughput, even from one c1841 through to c1921 to the other c1841. For more complex routing I would recommend not using static routes but using a routing protocol like EIGRP (which I am using as well and will describe later).
Single DSL connection with 4 wires using a straight cable
As one of the c1841s was a loaner, I then decided to setup the permanent connection slightly different using a 4-wire cable and configured the c1921 and c1841 slightly differently to utilise all 4 wires of the cable. The benefit of this setup is that it doubles the connection speed to approx. 4.5Mbit (still not really amazing considering that my internet connection over fiber cable is 50Mbit, but a bit more). This setup looks like this:
Below is the configuration used:
c1921 4-wire DSL connections to c1841:
controller SHDSL 0/0/0
 dsl-group auto
  shdsl 4-wire mode enhanced
 !
!
interface ATM0/0/0
  no ip address
  no atm ilmi-keepalive
  pvc 0/35
    encapsulation aal5snap
  !
  pvc 8/35
    encapsulation aal5mux ppp dialer
    dialer pool-member 2
  !
!
interface Dialer1
  ip unnumbered GigabitEthernet0/0
  encapsulation ppp
  dialer pool 2
  dialer-group 2
!
This setup is pretty similar to that before apart from how the SHDSL controller is configured and there is also (due to this configuration) only 1 ATM interface (so also only Dialer interface needed). However, as the controller is changed it is required to issue the following command to remove the previous dsl-group definitions to switch from the previous setup:
controller SHDSL 0/0/0
  no dsl-group 0
  no dsl-group 1
Before this new configuration can be entered, which also removes all configuration of the ATM interfaces (the Dial interfaces are unaffected). The corresponding configuration on the c1841 is:
c1841 4-wire DSL connections to c1921:
controller DSL 0/0/0
 mode atm
 line-term co
 line-mode 4-wire enhanced
 dsl-mode shdsl symmetric annex B
!
interface ATM0/0/0
 no ip address
 no atm ilmi-keepalive
 pvc 0/35
  encapsulation aal5snap
 !
 pvc 8/35
  encapsulation aal5mux ppp dialer
  dialer pool-member 1
 !
!
interface Dialer0
 ip unnumbered Loopback0
 encapsulation ppp
 dialer pool 1
 dialer-group 1
!
ip route 0.0.0.0 0.0.0.0 Dialer 0
!
dialer-list 1 protocol ip permit
!
With this new configuration early measurements indeed confirm the bandwith is higher, but not really doubled. As this is a connection to my test network, the performance is not really an issue but I like the idea of having physical cable that I can remove easily and the fact that my test network is not connected to my main switch / network in any way.
So… that intention from early 2015 to write things more often didn’t quite work out as you may see… As I changed jobs early 2015 I have not been able to post anything anymore since March 2015. Yes, the job was very demanding and I hardly had time to spend though that’s not the only reason for not posting (though it was all due to lack of time in the end).
Things are changing now (the change will probably be good, the reasons aren’t) so I will be reviving this blog again the coming days and weeks. I have literally hundreds of draft articles and ideas laying around to cover though time may still be the limiting factor…
I am currently creating an inventory of still to be covered topics to get started and expect to start posting regularly as of this weekend.
Today I noticed that my phone could no longer create any new calendar items. With Server.app I noticed that the Calendar (and AddressBook) services were no longer running and when checking their status, it took forever for the panel to load. Enabling the service again also took forever to not start (and unfortunately without any error message).
After some digging I found that the PostgreSQL server the Apple CalDav service uses internally was no longer running and issues starting In the logfiles in /var/log/caldavd/postgresql/ I found messages like:
2015-03-14 12:59:33.665 CET [689] LOG:  unexpected pageaddr 0/5DC82000 in log segment 000000010000000000000061, offset 13115392
2015-03-14 12:59:33.665 CET [689] LOG:  invalid primary checkpoint record
2015-03-14 12:59:33.679 CET [689] LOG:  unexpected pageaddr 0/5DC7C000 in log segment 000000010000000000000061, offset 13090816
2015-03-14 12:59:33.679 CET [689] LOG:  invalid secondary checkpoint record
2015-03-14 12:59:33.679 CET [689] PANIC:  could not locate a valid checkpoint record
I suspect these were caused by a crash a few days ago of my NAS that serves the iSCSI disks where the postgres data is stored. I spent a lot of time today to look for a solution (including trying to restore a backup and set it up from scratch, which all failed). In the end I found a clue in the manual page of pg_resetxlog:
DESCRIPTION pg_resetxlog clears the write-ahead log (WAL) and optionally resets some other control information stored in the pg_control file. This function is sometimes needed if these files have become corrupted. It should be used only as a last resort, when the server will not start due to such corruption.
This pretty closely matched my situation so (after making a backup of the DB folder) I executed the following command in the folder where Server.app stores it data (by default that is /Library/Server/Calendar and Contacts but in my case that’s /Volumes/Data/Library/Server/Calendar and Contacts as I store all data on a RAID5 container on my NAS)
After running this command the PostgreSQL for Services started again and my Calendar (and AddressBook) services were running again. So far it looks like I did not lose any data apart from a calendar entry that I had added on my Macbook in iCal.I am glad it is resolved, but I have to look into how backups are made so that the next time I at least know that I can get my calendar and contacts back…
Today I noticed that Crashplan running on my NAS was no longer backing up any files and that the backup set was 0 Mb and only 2 files (which should have been a few 100k files and > 350Gb). Rescanning the fileset didn’t help, neither did removing and adding the folders again.
After a little digging I noticed in the logs entries like (log message was a log longer but I only included the relevant part of it):
Googling for this message did not render any result unfortunately and this part of the Crashplan system is rather obscure (nothing to debug, messages are limited. The only thing I could think of to try to resolve it was to drop the cache Crashplan maintains (in the cache subdirectory of the Crashplan installation). It turns out that this was sufficient as after a restart the cache was rebuild and the the scan resulted in the expected number of filed.
The steps I performed were:
Stop the Crashplan engine
remove all files in the Crashplan cache/ subdirectory
Start Crashplan
Enforce a rescan of the fileset in [Settings] –> [Backup] –> Verify Selection [Now]
Since I had removed the folders from the backup set I feared that I had to upload all data again to my external backup targets, but Crashplan was smart enough not to need that.


 As per Apple Knowledge Base article HT208312, the once great Apple Server product as this fall will be reduced to: